Good evening! I'm currently deciding to give my poor fingers a break from the work of top-stitching as I have just jabbed myself rather brutally with the back of a needle, and as I have been working very hard the last few days I just so happen to have new material to post about. I am currently (perpetually) employed in making my Liliana Vess attire, which has come to the point where all that remains is hand work and attaching all the various pieces to one another. I have chosen to finish the corset with gold top stitching (just a simple quilting stitch) to hold the lining and the outer layers together and to turn/finish the edges. This sounds like it shouldn't be difficult, and in theory a quilting stitch like this is about as simple as it gets. What I did not account for however was the difficulty involved in using metallic threads. Every few inches the metallic strand decides to break or fray loose from the plastic strand that is wrapped around, and I have to stop, unthread my needle, and reassess things. Aside from that, progress is quite satisfactory, and I estimate no more than a week before I will be posting pictures of the finished pieces.
In light of the holiday, however, I am featuring some pictures of my mentor, mother, and assistant Minnie Stitches and her gypsy garb. Minnie is a seamstress of both skill and following, and without her many Djinn and Tonic creations would not be possible. The green brocade underskirt and bodice, and the white blouse are all samples of our unique designs made with re-purposed or remnant linens.
The bodice, as shown below, is fully lined and stiffened with plastic boning. It's cut with a five piece pattern (pieces 2 - 5 are cut double), and the finished piece laces fully up the back with a very wide ribbon. The rich color and texture that the brocade brings to the piece makes it perfect for use in the gypsy themed costume.
At the moment, this basic bodice comes in a s/m or an xs/s sizing (all sizes may be adjusted based on lacing) and it is not quite ready for sale. There are still a couple bugs that need working out in the design to lend speed to it's production. It does however lend itself to becoming a 'ready-made' garment with little need for specific or custom measurements.
If you'd like to see more similar designs in the future, please leave a comment below. Feedback will always be appreciated.
And now I do believe it is time for me to get back to work. Until next time...
~Djinni
Djinni Tehrani (all too human) and Cat-a-Tonic (a cat) bring you the products of our whimsy. Let our creativity give you the pieces to build your own. Find us on Facebook at https://www.facebook.com/djinnitonic
Tuesday, October 28, 2014
Thursday, October 16, 2014
We Shall Call It 'Leather'
In the past few days, I have come to discover that corset making is hard. I feel the largest part of my frustration comes from trying to make something professional without the correct materials. One of the pitfalls I suppose of my desire to use as much re-purposed fabric as possible. You will then understand my excitement when a co-worker of mine told me that she was looking for someone to take a great deal of lightly used leather off her hands. There are just so many great things that can be done with leather - I started imagining corsets and greatcoats, and Sir Reginald tells me he is in need of some new armor.
Well, I can honestly say that whatever I ended up with never saw a cow in it's life, or any sort of animal for that matter. I shall hereby call it 'leather' with the understanding that this should not be fooling anyone. That being said, there is a good deal of it and I should still be able to put it to use. My 'leather' is a dark black-brown in color, and slightly beat up in places. I am sure however that with a little bit of either brown or black shoe polish I can hide the blemishes and make it settle on a hue. It appears to be nigh indestructible unless I were to set it on fire, in which case I'm sure it would melt.
Currently I'm thinking of making my 'leather' into the corset style top pictured above, since I feel it would lend itself quite nicely to the various belts, straps, and fasteners involved in that project. I will need to find a variety of buckles and buttons in the same color of metal before I begin since the hardware is going to be it's only real decoration. As projects go, this one is currently living in the thoughts and dreams stage, and I'm not sure when It will move on into completion. Please expect an update pretty much as soon as I start making progress, likely with more sketches and some photographs of the raw materials that I'm working with.
A quick question to my readers. If you are interested in purchasing a piece such as the one above, is the authenticity of the leather important to you? Would you mind buying one made of 'leather' if it was well made and for a reasonable price? Please drop me a line and let me know.
As always, thanks for checking in and lending me your support in my creative endeavors.
~Djinni
Monday, October 13, 2014
Liliana Vess
Good morning, and thank you for stopping in to visit my first post. Although I have been in the business of delightful creation for many years now, it is only recently that I have taken to documenting the process. My current project serves two purposes: first and foremost, as any young woman of my age and disposition I am eagerly awaiting my wedding. Among the preparations I am making for the occasion will be a hand made wedding gown graced by a likewise hand made corset. Now as anyone who has attempted this sort of thing in the past can attest, corset making is an art form with many many pitfalls - especially when all the patterns are being made from scratch. To ensure perfect fit and construction of the final piece, (and to expand my own wardrobe) I have elected to make several trial corsets before starting one in white
This concept brings me neatly to my second reason for my project. Halloween (Samhain to the initiated) is just around the corner, and I do enjoy a good reason to dress in costume. This year, I have elected to become Liliana Vess, the powerful dark plainswalker from the Magic the Gathering multiverse (pictured to the right). This outfit allows me the opportunity to hone my skill while keeping in the spirit of the holiday. It has the added bonus of keeping a certain gentleman in my life, Sir Reginald Poppycock, very happy, as she is one of his favorite characters. As this is a rather large undertaking to put together within the month, I have enlisted the help of my mother - a skilled seamstress who has taught me her craft. Yesterday was our second session collaborating on this specific project, and it produced some lovely results
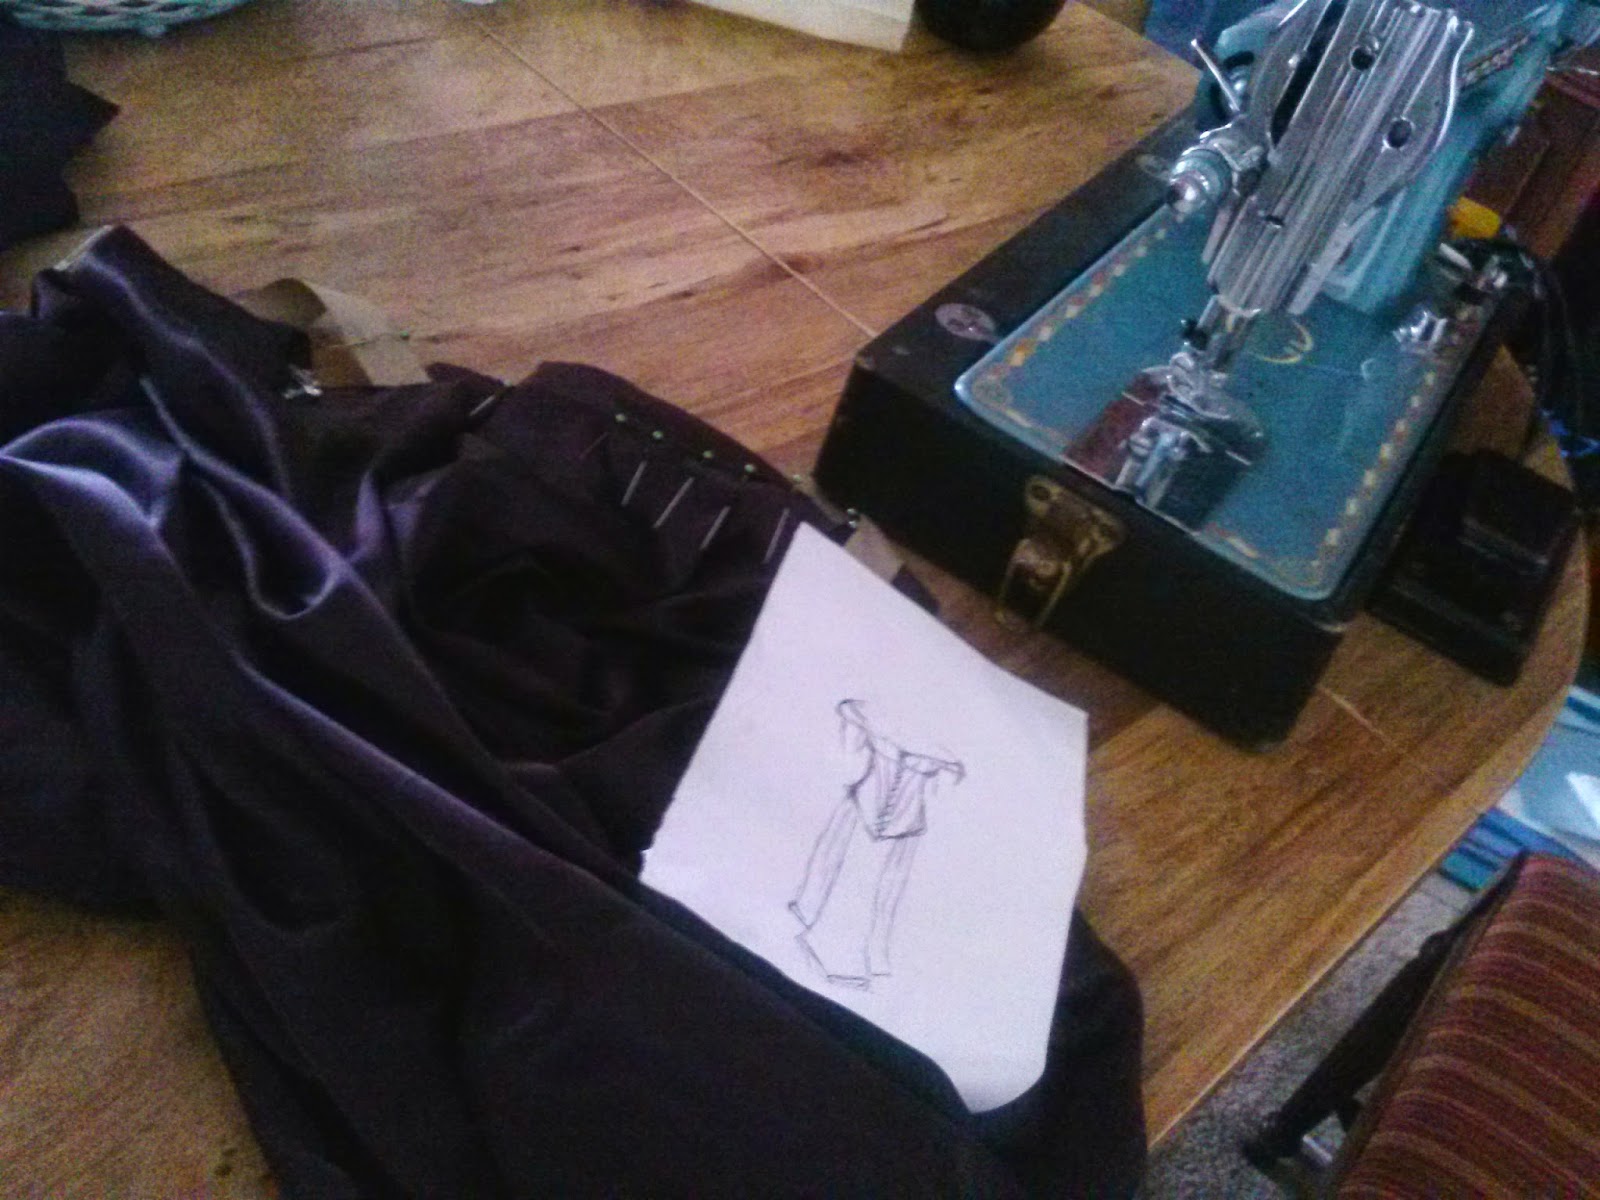
My first step, with any new project is to do a sketch of what I'm looking to create. In this case, I knew that I had to modify the skirt so that it would move correctly on a real person, yet still maintain the high slit that Lili is known for. To solve this problem I have included a semicircular drape in back overlapping a slightly more substantial panel that falls in front. This creates a high slit up both legs while preserving the modesty and mobility of the wearer. This whole piece will then wrap in place and fasten to the over-bust corset with a series of hook and eye fasteners creating the look of a full dress, but allowing the versatility of wearing both pieces separately in the future. As the skirt was already completed in advance, there is not much more to say regarding it's construction.
Our corset pattern is one that we made (it really does take two people to make one completely from scratch) for a previous project. It needed a few modifications to provide for laces in the front as well as the back, and I needed to reshape the pieces to add a bit more of a sinch to the overall finished product. If you are at all curious what the first version of the pattern produced, images of a green brocade version are posted on my facebook. We use a 5 piece pattern (two of each piece are needed creating 10 when all is said and done) and several additional pieces are needed to create the panels behind the laces. I have chosen an eggplant purple costume satin for the face material and an old-gold colored lining fabric. Because neither of these are particularly sturdy, we also used a core fabric (anything that can take a beating and is not likely to fray) as well as iron on facing to give the finished piece some substance.
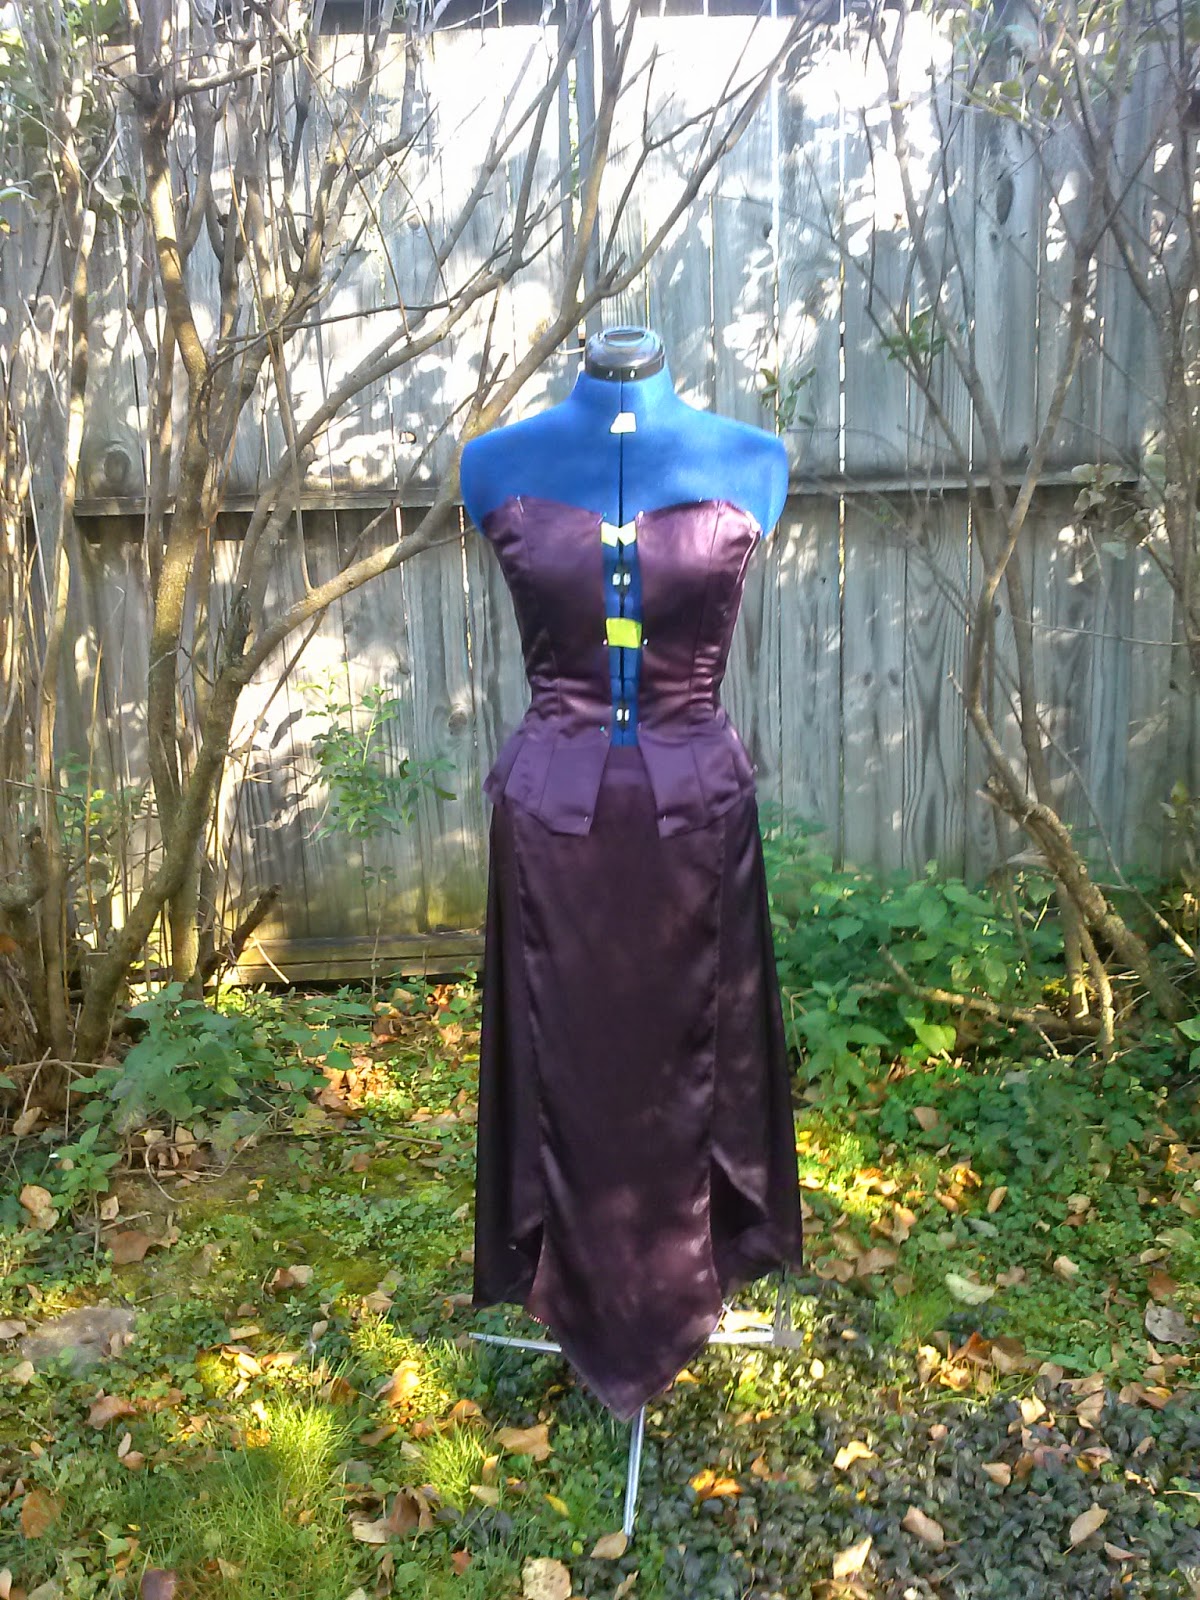
When I arrived to work yesterday morning, we had already finished sewing the facing layer and the core into place as well as sewing the lining together. The top layers are pictured to the right pinned into position. What remained to be done was to add channels for the boning, shape the bust, and finish the front and back edges so that we could add the grommets for the lacing. I am in the process of ordering steel boning and other professional grade hardware, but in case it does not arrive in time for Halloween, I am prepared to use a heavy duty plastic boning, and we made the channels accordingly.
This dress, just like the ultimate corset I design for the wedding, should be made to not require any additional undergarment. In order to produce something that offers the correct amount of support, I have cannibalized the cups out of an existing undergarment. This was my quick and easy method, however it is possible to order a multitude of different products either online or in stores that would serve the same purpose if you don't have old dead lingerie laying about . By building in this type of construction however you will almost certainly have to modify the fit of the bust, and to leave the piece open to alteration you will not be able to place the boning in the seam allowance. We used a bias tape to run casings along up the center of several panels, both in the front and the back of the corset creating those lovely double seams and quilting the core and the facing fabrics together. The hardest part of the whole process seemed to be keeping these seams straight and even by eye and the positioning of the cups when you have to hold the whole contraption together on your body.
The final job we got completed was turning the front and back edges and adding grommets for the laces. I'm not at all happy with the punch or the grommets that we used for this version. The punch did not cut the fabric very well, and seemed to break progressively the more we used it. Also the grommets look lovely from the front but did not seem to crimp well in the back. Truthfully I'm not sure if they are at fault or if the breaking punch is responsible for the sloppy finish on them, but either way I'm looking into other options. All in all, the corset is coming together nicely. All the hard machine sewing is basically done and I'm left at this point attaching the lining by hand and doing some decorative gold top stitching along the edges. I hope to get most of the hand work done in the next week or so so that when we meet again we can grommet the back, attach the panels, and bone and lace the finished piece. I will be leaving the lining loose at the bottom until the last possible moment to provide us the opportunity to wait for the steel bones if they ship in time. Finishing the bottom and adding the hooks to tie the finished dress together will be the simple work of one afternoon in any case; by no means a taxing part of the job.
If you're interested in my work, please leave a question or comment on this post. I'm not yet ready to market my creations, but if something catches your eye please drop me a line so that I can gauge the interest in the different pieces I post here. A the present stage, my blog is by no means supposed to be a 'how to...', merely to document my creative process on my way to a final, polished, and eventually marketable product.
Thanks for reading,
~Djinni